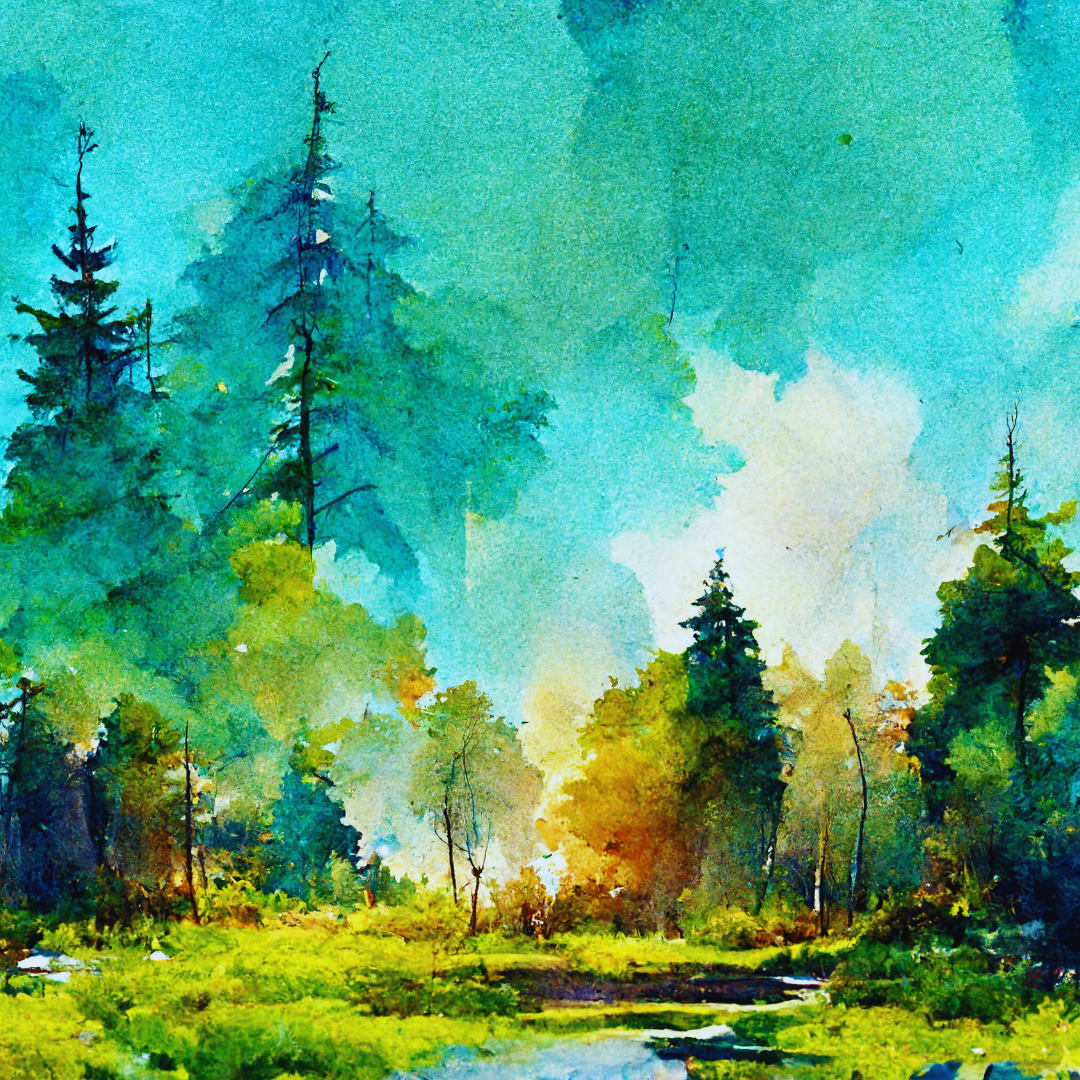
Watercolor painting offers a unique blend of fluidity and expression, making it a favorite among artists. Mastering essential watercolor techniques can elevate an artist’s work from basic to breathtaking. Exploring techniques like wet-on-wet, layering, and dry brushing can unlock a world of possibilities in watercolor paintings.
Every artist, whether a beginner or experienced, benefits from a solid understanding of painting techniques that define the medium. Learning how to manipulate water and pigment effectively is crucial for creating depth and texture. Techniques such as gradients and wash applications enable artists to achieve effects that are both visually stunning and emotionally resonant.
Embracing these foundational skills will empower artists to experiment and develop their unique style. With a variety of methods at their disposal, they can create intricate landscapes, delicate florals, and vivid abstracts. Ultimately, these watercolor techniques foster creativity and help bring an artist’s vision to life.
Understanding Watercolor Materials
Watercolor painting requires specific materials that can significantly influence the outcome of a piece. Key aspects include the choice of paper, the qualities of watercolor paints, and the types of brushes used. Each component plays a vital role in achieving the desired effects.
Choosing the Right Paper
The choice of paper is crucial for watercolor painting. It typically comes in three textures: rough, cold-pressed, and hot-pressed.
- Rough paper has a pronounced texture, suitable for bold brushstrokes and granulation.
- Cold-pressed (or NOT) has a moderate texture, ideal for general use.
- Hot-pressed paper is smooth, perfect for fine details.
The weight of the paper also matters. Heavier weights (around 300 gsm) can absorb more water without warping. This allows for techniques like wet-on-wet without damaging the surface. Choosing the right paper directly impacts the final appearance of the artwork.
Selecting Watercolor Paints
Watercolor paints can be found in two main forms: tubes and pans.
- Tubes offer a rich consistency and are great for larger washes.
- Pans are compact and easy to transport, ideal for plein air painting.
Quality matters in watercolor paints. Artist-grade paints contain more pigment, resulting in better pigmentation and longevity. Student-grade options, while more affordable, often contain fillers that dilute colors and can affect transparency.
Color mixing varies among brands, so experimenting with different paints helps understand their characteristics. This can lead to greater artistry and proficiency.
Understanding Brushes and Their Strokes
Brushes come in various shapes, each serving a specific function. Common types include round, flat, and fan brushes.
- Round brushes are versatile, perfect for detail work and washes.
- Flat brushes excel in creating broad strokes and clean edges.
- Fan brushes create textures and foliage effects.
The size of the brush affects both coverage and detail. Smaller brushes work well for intricate designs, while larger brushes deliver sweeping strokes.
Brushstroke techniques vary from fine lines to broad washes, impacting the painting’s mood. Understanding how to manipulate these tools enhances artistic expression and style.
Mastering Watercolor Techniques
A variety of watercolor techniques can elevate an artist’s skill set. Understanding each method enhances control over aesthetics and detail in artwork.
Perfecting the Wet-on-Wet Technique
The wet-on-wet technique involves applying wet paint onto wet paper, allowing for soft edges and smooth blending. This method is particularly effective for creating gradients, as colors effortlessly merge without harsh lines.
Steps to Execute:
- Wet the paper with clear water and use a brush to apply the desired pigment.
- Monitor the paint’s movement; it will spread based on water levels.
- Experiment with color combinations to observe how they interact.
This technique is ideal for skies and soft landscapes where diffusion is key. Feathering and stippling can add depth, encouraging gentle transitions between hues.
The Art of Dry Brush Technique
The dry brush technique employs a brush with minimal water and pigment, creating textured strokes on dry paper. This approach is excellent for detailing and adds a tactile dimension to artworks.
Execution Tips:
- Select a stiff-bristled brush and load it with paint.
- Lightly drag the brush across the paper surface, allowing it to skip over the texture.
- Adjust pressure for varying intensity.
Artists often use dry brushing for grass, fur, or wood textures. The key is controlling the pressure and stroke to maintain detail while imparting a sense of realism.
Exploring the Glazing Technique
Glazing involves layering transparent washes over dried paint, enriching color and luminosity. This method is vital for achieving depth in complex compositions.
Steps for Effective Glazing:
- Ensure the initial layer is completely dry before applying the glaze.
- Mix a diluted wash of the desired color and apply it evenly.
- Assess the effect and repeat if necessary, maintaining transparency for subtle shifts.
Glazing allows for color adjustments without losing the underlying tones. It’s particularly effective for skin tones, making them more vibrant and lifelike.
Achieving Textures with Salt and Splattering
Textural effects can be created using techniques like salt application and splattering. These methods introduce unique patterns and visual interest.
Techniques for Texture:
- Salt Technique
- While the paint is still wet, sprinkle salt onto the surface.
- As it dries, the salt absorbs water, creating distinct shapes.
- Splattering
- Use a brush or toothbrush to flick diluted paint onto paper.
- Control splatter size by adjusting the brush’s load and distance from the paper.
Both methods can enhance backgrounds or focal points, contributing unexpected elements to the piece. Experiment with various colors and sizes for diverse effects.
Refining Your Technique
Refining painting techniques enhances an artist’s skill and precision. Two essential methods to master are lifting for corrections and the wet-on-dry technique, each offering unique effects and control.
Utilizing Lifting for Corrections and Effects
Lifting allows an artist to correct mistakes and alter parts of their watercolor. It involves using a damp brush, paper towel, or sponge to lift paint from the paper’s surface.
- Dampening the Area: Lightly wet the area you wish to correct. This softens the paint, making it easier to lift.
- Using Tools: A clean, damp brush can gently scrub or blot the paint away. Paper towels or sponges can also absorb excess color.
- Creating Effects: Artists often use lifting to create highlights or texture. This technique can produce soft edges and intriguing backgrounds, adding depth to compositions.
Mastering lifting expands the artist’s ability to refine their work without needing to start over.
Exploring the Wet-on-Dry Technique
The wet-on-dry technique involves applying wet paint onto dry paper, helping achieve stark contrasts and defined edges. This method is ideal for detailed sections of a painting.
- Control: This approach provides greater control over the application of paint compared to wet-on-wet. Artists can manipulate the edges and flow.
- Layering: With this technique, artists can layer colors effectively. Each layer can build intensity and complexity in the painting.
- Soft Edges: When transitioning colors, the artist can soften edges by lightly brushing with a damp brush after initial strokes.
By mastering wet-on-dry, an artist can create crisp details alongside smooth gradients, enhancing the painting’s overall quality.